How to Connect Your OWL Agent to Notion via the MCP Server
Empower your CAMEL-AI OWL agent to interact with Notion using the MCP server.
Have you ever wanted your AI agent to read from or write to your Notion workspace? With Notion’s new **Model Context Protocol** server and CAMEL-AI’s OWL multi-agent framework, this is now possible in a secure and structured way.
In this post, we’ll walk through how to connect a CAMEL-AI agent (using OWL) to Notion using the official Notion Model Context Protocol Server. By the end, our AI agent will be able to find a Notion page and even update its content automatically – all with your permission and oversight.
The **Notion MCP Server** is an official server (from Notion) implementing this protocol for the Notion API. In simple terms, it acts as a bridge between an AI agent and your Notion data – the agent sends requests to the MCP server as if using tools, and the server translates those into actual Notion API calls. This means our agent can safely query or modify Notion content you allow it to, without giving the agent direct unrestricted access to the Notion API.
In this tutorial, we’ll follow these steps:
- Setup a Notion integration (with minimal required capabilities and access to a specific page).
- Configure and run the Notion MCP server (so it’s ready to accept the agent’s tool calls).
- Use CAMEL’s **MCPToolkit** in code to connect our agent to the Notion MCP server.
- Construct an OWL agent society that includes a tool-enabled assistant agent.
- Execute a Notion-related task (our example: find a Notion page and add a list to it) and verify the result.
- Clean up the MCP connection and recap future possibilities.
Let’s dive in!
Before coding, we need to prepare Notion:
1. Create a Notion integration: Go to your Notion Integrations page (on Notion’s website/app, under Settings & Members -> Integrations) and click **“+ New integration”.**Give your integration a name (e.g., "MyMCP Test") and select the workspace it will belong to (if you have multiple workspaces) (1).
Make sure to choose Internal as the integration type (3) since we just need a private token. Finally, click Save (4). This registers a new internal integration that will represent our agent in Notion.
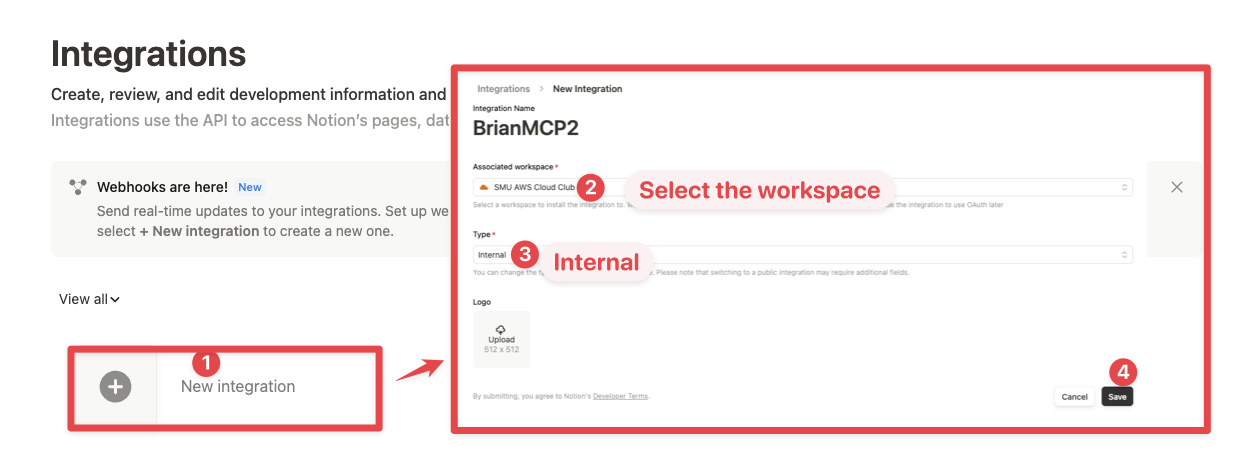
Creating a new integration in Notion, selecting workspace and type.
2. Limit the integration’s capabilities: After creating the integration, you’ll see a configuration page with Capabilities options. For a safe start, enable only “Read content” access (highlighted), leaving other checkboxes (like update or insert content) unchecked.
This makes the integration read-only, minimizing risk to your workspace data. (You can enable write capabilities later if you want the agent to modify content, but it’s wise to start with least privilege.)
Ensure “No user information” is selected at the bottom to keep things privacy-friendly. Notion will display these requested capabilities when you connect the integration to pages, so keeping scope narrow is good practice.
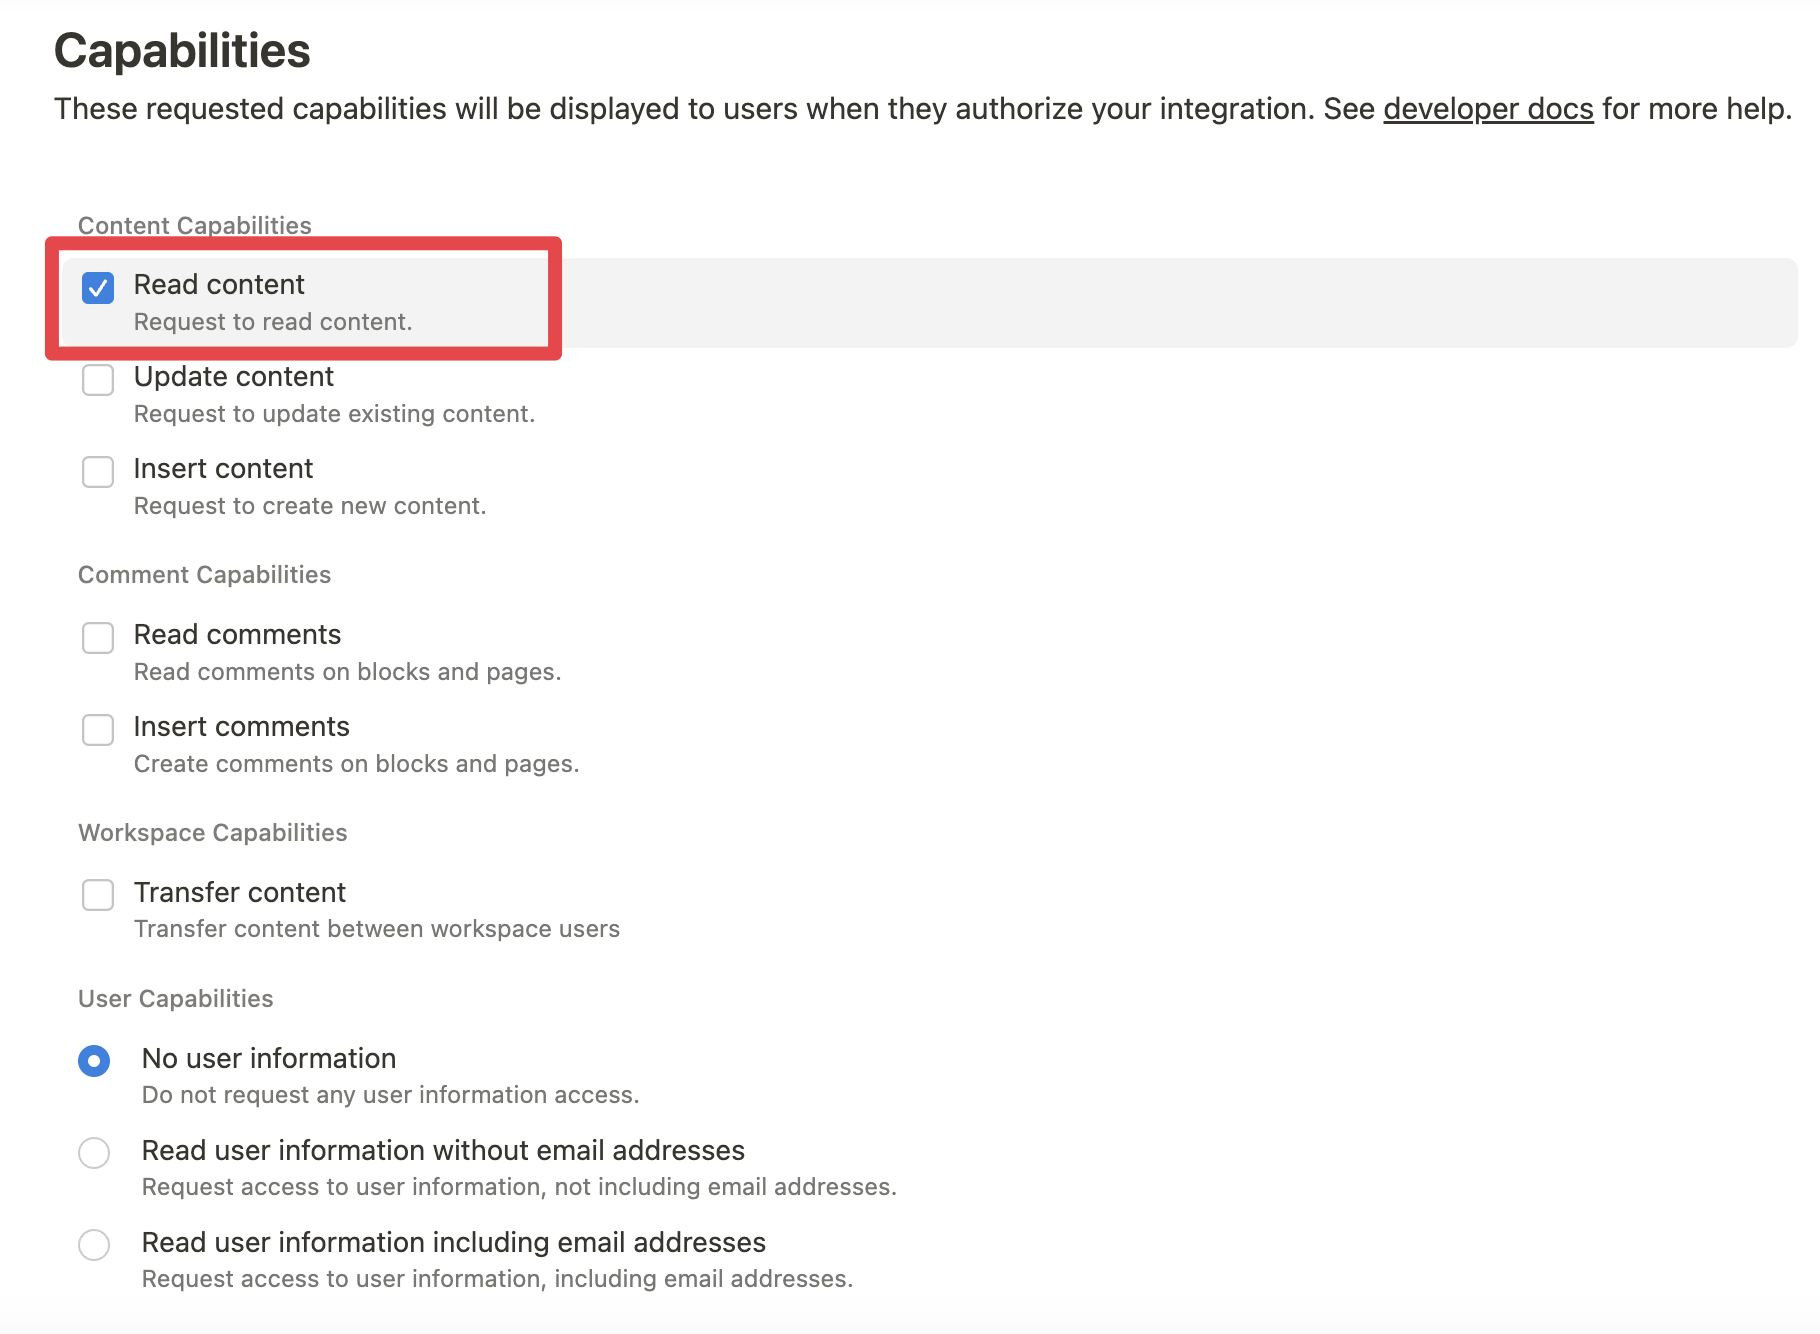
Configuring integration capabilities with read-only access (as per requirement).
- Copy the integration token: On the integration’s page, find the Internal Integration Token (usually under a "Secrets" or "Show" section). Copy this long token string – it typically starts with secret_ or ntn_.
This token is essentially the API key that the Model Context Protocol server will use to act on your Notion workspace on behalf of this integration. Keep it secret (don’t share it or commit it to code repos) since it grants the allowed access to your Notion content.
- Share a Notion page with the integration: Now decide which page (or pages) you want the agent to access. In our example, we have a page titled “Travel Itinerary” that we want the agent to read and update. Open that page in Notion, click the ... (three dots) menu at the top-right, and select Add connections (or Connections ->+ Connect integrations). Find your new integration (it should appear by the name you gave, e.g. "MyMCP Test") and add it as a connection. This explicitly grants the integration access to that page (and its sub-pages). In our screenshot example, the integration “Brian’sMCP” was added to a page called "School" (3) – once connected, it shows the permissions (e.g. “Can edit” with checkmarks for read, update, insert content, etc., based on what capabilities were enabled) at the bottom. Only pages you share with the integration are accessible to it, so this step is crucial. If you skip it, the MCP calls won’t find or be allowed to read your page even if the token is correct.
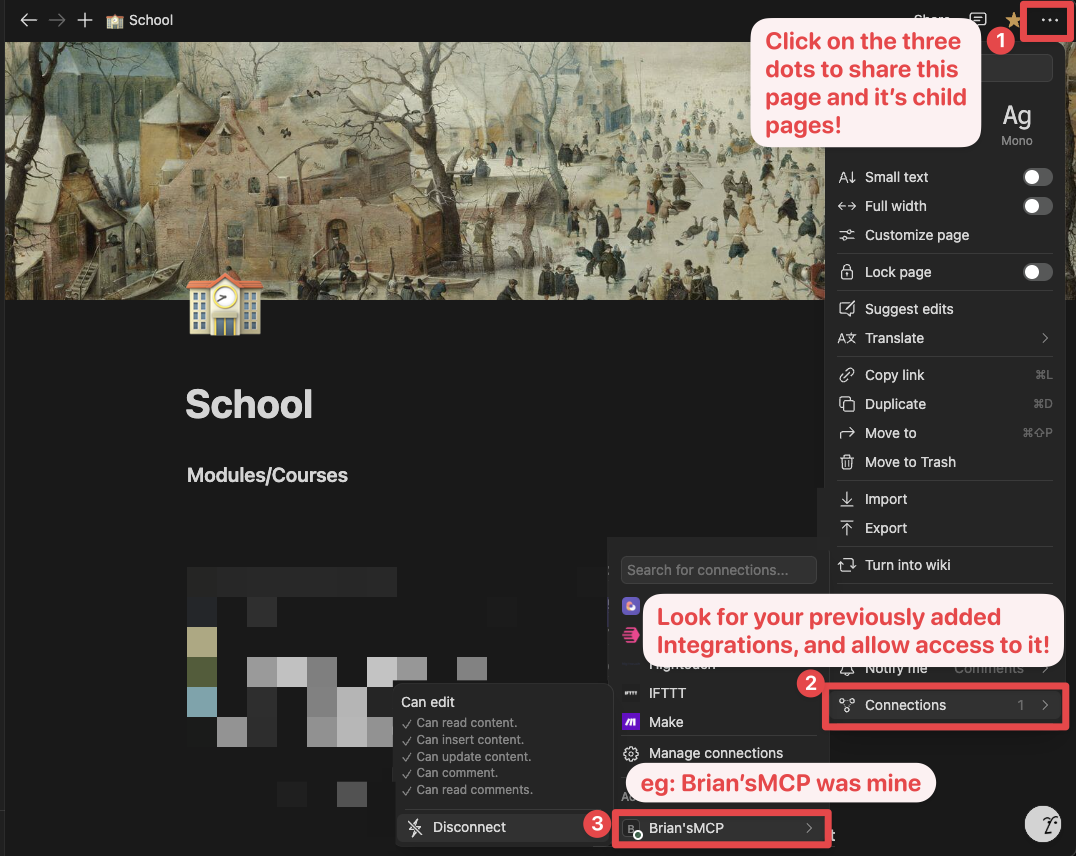
Sharing a Notion page with the integration.
Running the Notion MCP Server
The Notion MCP server is a small service (provided by Notion via npm or Docker) that translates tool-like commands into actual Notion API calls. You can run it locally. The easiest way is using npx (Node.js):
# Install and run the Notion MCP server via npx (Node.js)
npx -y @notionhq/notion-mcp-server
When you run this, the server will start (by default on port 8080). However, you need to provide it with your integration token and Notion API version so it can authenticate to Notion. The server reads these from an environment variable OPENAPI_MCP_HEADERS.
For example, on Linux/Mac you could start the server with:
export OPENAPI_MCP_HEADERS='{"Authorization":"Bearer YOUR_INTEGRATION_TOKEN","Notion-Version":"2022-06-28"}'
npx -y @notionhq/notion-mcp-server
Make sure to replace YOUR_INTEGRATION_TOKEN with the token you copied in step 3. The Notion-Version should match the latest API version or the one your integration requires.If all goes well, the server will be running at http://localhost:8080/v1 and ready to accept requests.
Alternatively, Notion also provides a Docker image for this MCP server if you prefer (so you don’t need Node.js). Using Docker, you’d set an environment variable similarly and run the container as described in the official instructions. Either way, keep the server running while we proceed – our agent will connect to it.
Now we move to the Python side with CAMEL-AI. CAMEL provides an MCPToolkit that knows how to communicate with MCP servers. We need to tell it where our Notion MCP server is and how to authenticate. This is done via a config JSON. Let’s create a config file (e.g., mcp_congfig.json) for our Notion server:
{
  "all_tool_apis": [
    {
      "url": "http://localhost:8080/v1",
      "headers": {
        "Authorization": "Bearer YOUR_INTEGRATION_TOKEN",
        "Notion-Version": "2022-06-28"
      }
    }
  ]
}
Initializing MCPToolkit in Code
With the config in place and the server running, we can now connect to it using CAMEL’s toolkit. Below is a Python snippet to initialize the MCPtoolkit and establish a connection:
from camel.toolkits import MCPToolkit

# Initialize the MCP toolkit with our Notion config and connect to the MCP server
mcp_toolkit = MCPToolkit(config_path=str(config_path))
await mcp_toolkit.connect()
Building an OWL Agent to Use Notion
The power of CAMEL’s OWL framework is that we used here is that it can autonomously decide which tools to use to fulfill a high-level request. We don’t have to manually call each tool; we just provide the tools and the task, and the agent will figure out the rest.
In our scenario, we want the agent to find a specific Notion page and add some content to it. For example, suppose we have a travel planning page and we want the AI to add a new to-do or bullet item ("Top 10 travel destinations in Europe") to that page. We’ll formulate this as a natural language instruction to the agent, and the agent (if everything is set up) will use the Notion tools to carry it out.
Here’s the code to construct the agent society (user + assistant) and execute the task:
import os
import asyncio
import sys
from pathlib import Path
from typing import List

from dotenv import load_dotenv

from camel.models import ModelFactory
from camel.toolkits import FunctionTool, MCPToolkit
from camel.types import ModelPlatformType, ModelType
from camel.logger import get_logger, set_log_file

from owl.utils.enhanced_role_playing import OwlRolePlaying, arun_society

# Set logging level
set_log_file("notion_mcp.log")
logger = get_logger(__name__)

# Load environment variables
load_dotenv(os.path.join(os.path.dirname(__file__), '../../owl/.env'))

async def construct_society(
    question: str,
    tools: List[FunctionTool],
) -> OwlRolePlaying:
    """Build a multi-agent OwlRolePlaying instance for Notion management."""
    models = {
        "user": ModelFactory.create(
            model_platform=ModelPlatformType.OPENAI,
            model_type=ModelType.GPT_4O,
            model_config_dict={
                "temperature": 0.7,
            },
        ),
        "assistant": ModelFactory.create(
            model_platform=ModelPlatformType.OPENAI,
            model_type=ModelType.GPT_4O,
            model_config_dict={
                "temperature": 0.7,
            },
        ),
    }

    user_agent_kwargs = {"model": models["user"]}
    assistant_agent_kwargs = {
        "model": models["assistant"],
        "tools": tools,
    }

    task_kwargs = {
        "task_prompt": question,
        "with_task_specify": False,
    }

    return OwlRolePlaying(
        **task_kwargs,
        user_role_name="notion_manager",
        user_agent_kwargs=user_agent_kwargs,
        assistant_role_name="notion_assistant",
        assistant_agent_kwargs=assistant_agent_kwargs,
    )

async def execute_notion_task(society: OwlRolePlaying):
    """Execute the Notion task and handle the result."""
    try:
        result = await arun_society(society)

        if isinstance(result, tuple) and len(result) == 3:
            answer, chat_history, token_count = result
            logger.info(f"\nTask Result: {answer}")
            logger.info(f"Token count: {token_count}")
        else:
            logger.info(f"\nTask Result: {result}")

    except Exception as e:
        logger.info(f"\nError during task execution: {str(e)}")
        raise

async def main():
    config_path = Path(__file__).parent / "mcp_servers_config.json"
    mcp_toolkit = MCPToolkit(config_path=str(config_path))

    try:
        logger.info("Connecting to Notion MCP server...")
        await mcp_toolkit.connect()
        logger.info("Successfully connected to Notion MCP server")

        default_task = (

            "Notion Task:\n"
            "1. Find the page titled 'Travel Itinerary\n"
            "2. Create a list of Top 10 travel destinations in Europe and add them to the page along with their description.\n"
            "3. Also mention the best time to visit these destintions.\n"

        )

        task = sys.argv[1] if len(sys.argv) > 1 else default_task
        logger.info(f"\nExecuting task:\n{task}")

        tools = [*mcp_toolkit.get_tools()]
        society = await construct_society(task, tools)

        await execute_notion_task(society)

    except Exception as e:
        logger.info(f"\nError: {str(e)}")
        raise

    finally:
        logger.info("\nPerforming cleanup...")
        tasks = [t for t in asyncio.all_tasks() if t is not asyncio.current_task()]
        for task in tasks:
            task.cancel()
            try:
                await task
            except asyncio.CancelledError:
                pass

        try:
            await mcp_toolkit.disconnect()
            logger.info("Successfully disconnected from Notion MCP server")
        except Exception as e:
            logger.info(f"Cleanup error (can be ignored): {e}")

if __name__ == "__main__":
    try:
        asyncio.run(main())
    except KeyboardInterrupt:
        logger.info("\nReceived keyboard interrupt. Shutting down gracefully...")
    finally:
        if sys.platform == 'win32':
            try:
                import asyncio.windows_events
                asyncio.windows_events._overlapped = None
            except (ImportError, AttributeError):
                pass
Explanation of the above code:
- Task prompt: We set Default Task to a high-level instruction: “Find the Notion page titled 'Travel Itinerary' and add 'list of Top 10 travel destinations in Europe*' as a bullet point item on that page.”* This is the goal we want the Agents to achieve. It’s a single string describing a fairly complex task (involves searching and editing content). This will serve as the User agent’s input in our OWL society..
- Construct the OWL society: We use OWL agent society that sets up a conversation between two agents:
- a User agent that will present the task (QUESTION) as its message,
- and an Assistant agent that has access to the tools we provided (the Notion tools from MCPToolkit). Internally, CAMEL will assign the appropriate roles and system prompts. The assistant is aware that it can use these tools to help solve the task. (Typically, the assistant’s system prompt in an OWL setting would encourage it to use the tools when relevant, in a reasoning loop.)
- Run the conversation: When we call await owl_society.run(), CAMEL’s OWL orchestrator kicks in. The user agent provides the task, and the assistant agent (powered by an LLM, e.g., GPT-4 or Claude) starts reasoning how to accomplish it. Because the assistant has tool access, it can decide to invoke a tool.
For instance, to fulfill our request, the assistant might first use a search tool to find the page ID of "Travel Itinerary" (since it only knows the title from the prompt).
Once it finds the page, it can then use an append or update tool to add a bullet point with "Top 10 travel destinations in Europe" to that page. All these actions are performed via the MCPToolkit behind the scenes: the assistant agent “calls” a tool, and MCPToolkit sends the corresponding request to the Notion Model Context Protocol server, which in turn calls the Notion API. OWL handles the loop of agent thought -> tool use -> observation result -> next thought, until the task is done. Finally, the assistant formulates an answer.
If everything went well, your Notion "Travel Itinerary" page should now have a new bullet (or to-do, depending on how the agent chose to format it) saying "Top 10 travel destinations in Europe …."!
🎉 The agent autonomously figured out how to use the Notion API calls to achieve the goal we gave it.
To see this integration in action, check out our demo video showcasing the CAMEL-OWL agent interacting with Notion via the MCP server.
Your browser does not support the video tag.
Cleaning Up and Best Practices
After the agent has finished, it’s good to clean up any connections or sessions. In our Python code, we can call:
await mcp_toolkit.disconnect()
This will gracefully close the connection to the MCP server (freeing up resources). If you plan to reuse the toolkit for another query immediately, you might keep it open, but generally closing it when done is a good practice. Also, if you started the Notion MCP server in a terminal, you can stop it (CTRL+C) once you’re finished with all tasks.
A few best-practice reminders:
- Scope and Permissions: Only grant the integration the permissions it truly needs. In our demo, we could have given it write access (and indeed we allowed it to add a bullet). If you only need read access (for an agent that summarizes or answers questions from Notion content), keep the token read-only.If you do allow writing, consider creating a dedicated page or database for the agent to write to, rather than giving it free rein on your entire workspace. Notion’s sharing model lets you precisely control which pages the agent can see or edit.
- Monitor the Agent’s Actions: Especially when first experimenting, keep an eye on what the agent is doing. The MCP server logs or console output can show the API calls being made. You can also check the page’s edit history or content to verify changes. This helps build trust that the agent is doing what you expect.
- Safety of MCP: The official Notion Model Context Protocol server is designed with some safety in mind – it doesn’t expose destructive operations (e.g., deleting pages or databases is not allowed via MCP). Still, any action that can create or modify content should be treated carefully. Always test with non-critical data until you’re confident.
Conclusion and Future Potential
In this post, we saw how to empower a CAMEL-AI OWL agent with the ability to interface with Notion. By using Notion’s Model Context Protocol server and CAMEL’s MCPToolkit, we connected the dots between an AI’s reasoning and real actions on a Notion page.
The result is an AI agent that can not only read your notes and data but also write or update information in a controlled way. This opens up a world of possibilities: imagine an agent that could update your to-do list, log meeting notes into Notion, or cross-reference and summarize project documentation – all automatically.
The integration we demonstrated is just the beginning. The Notion Model Context Protocol server currently supports key actions like searching, reading content, adding pages or comments, etc. Over time, we may see support for more Notion API capabilities (for example, querying databases or updating specific properties) to enrich what agents can do.
These will likely be added in a safe manner, ensuring agents don’t perform irreversible changes without explicit permission. You as a developer can also build on this idea – perhaps creating custom prompts or agent roles that use Notion as a knowledge base, or combining the Notion toolkit with other toolkits (imagine an agent that researches online and logs findings into Notion).
In summary, connecting AI agents to tools like Notion makes them far more useful and context-aware. Thanks to OWL’s structured approach and Notion’s official support via Model Context Protocol, this can be done securely and elegantly. We encourage you to try it out with your own Notion pages and creative agent prompts.Happy building, and may your agents be ever helpful! 🚀
For more details, check out the official _Notion MCP Server repository on GitHub_, which includes setup instructions and examples.
CAMEL-AI’s documentation and OWL framework resources are also great to explore for building advanced agent behaviors.
Recent Posts
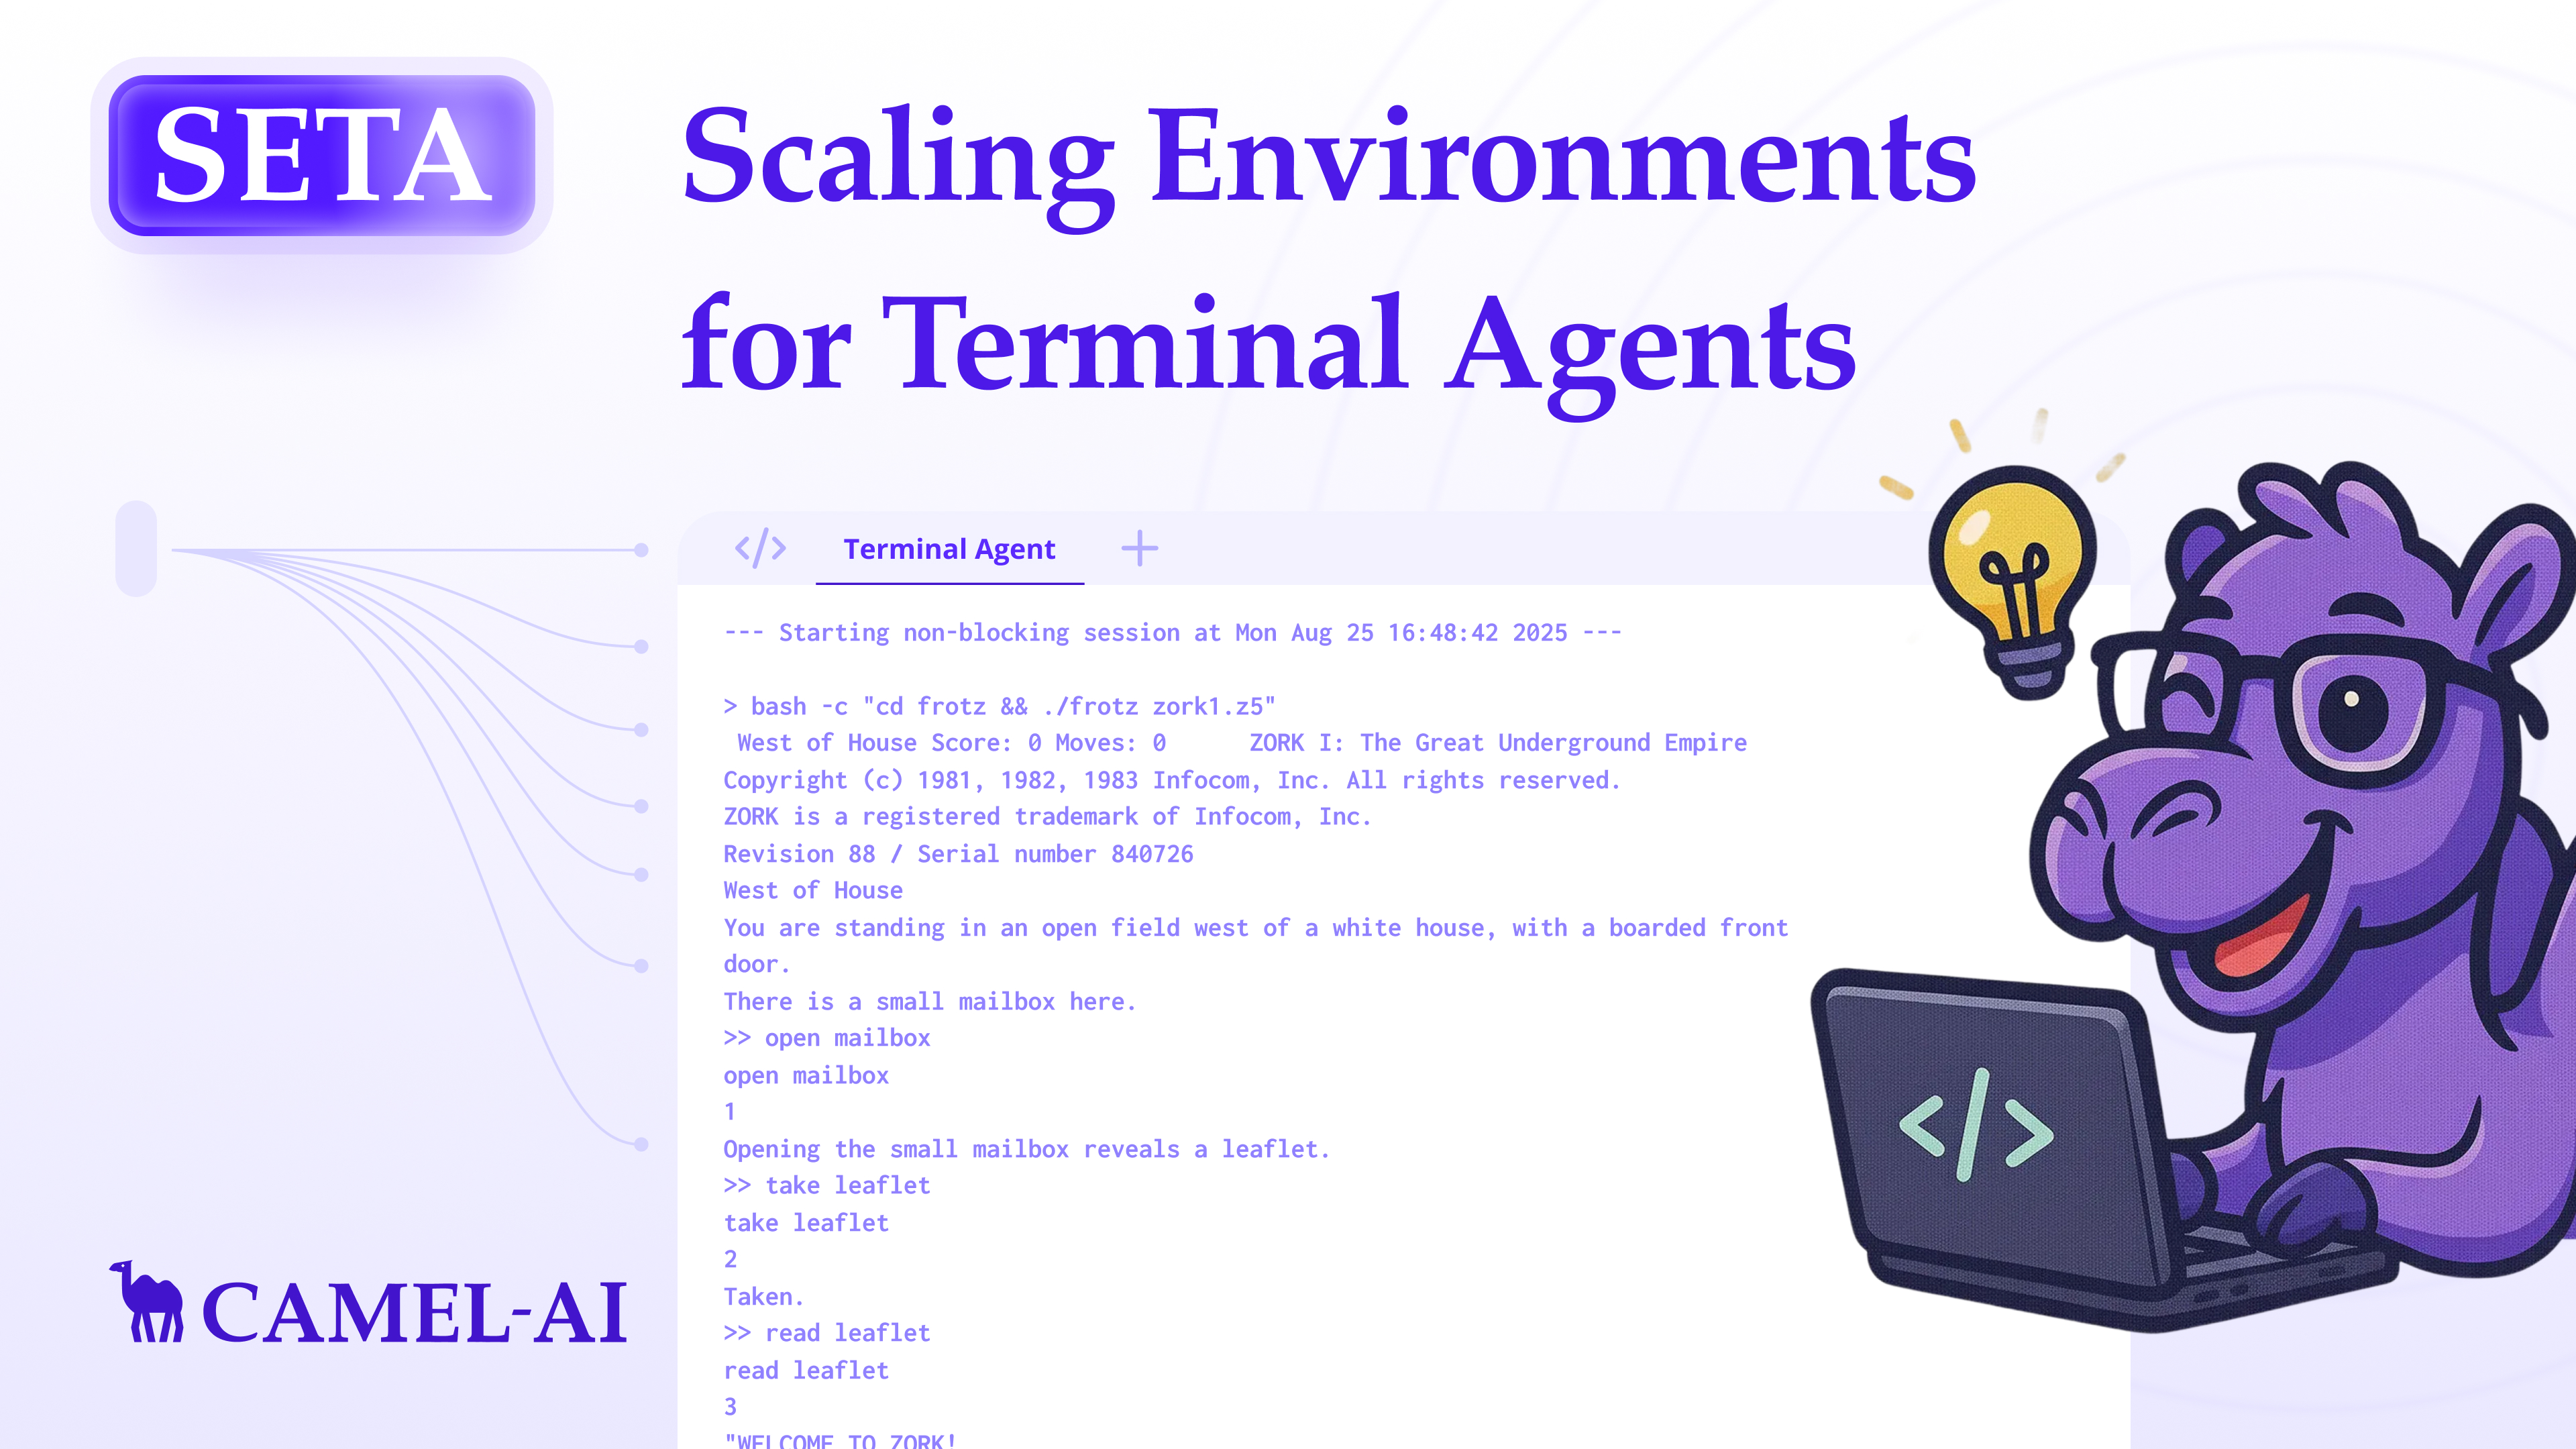
SETA: Scaling Environments for Terminal Agents
In SETA, we start with building robust toolkits to empower the agent’s planning and terminal capability, and achieved SOTA performance
Brainwash Your Agent: How We Keep The Memory Clean
How CAMEL Rebuilt Browser Automation: From Python to TypeScript for Reliable AI Agents
How CAMEL AI rebuilt browser automation with TypeScript for faster, smarter, and more reliable AI web interactions.